
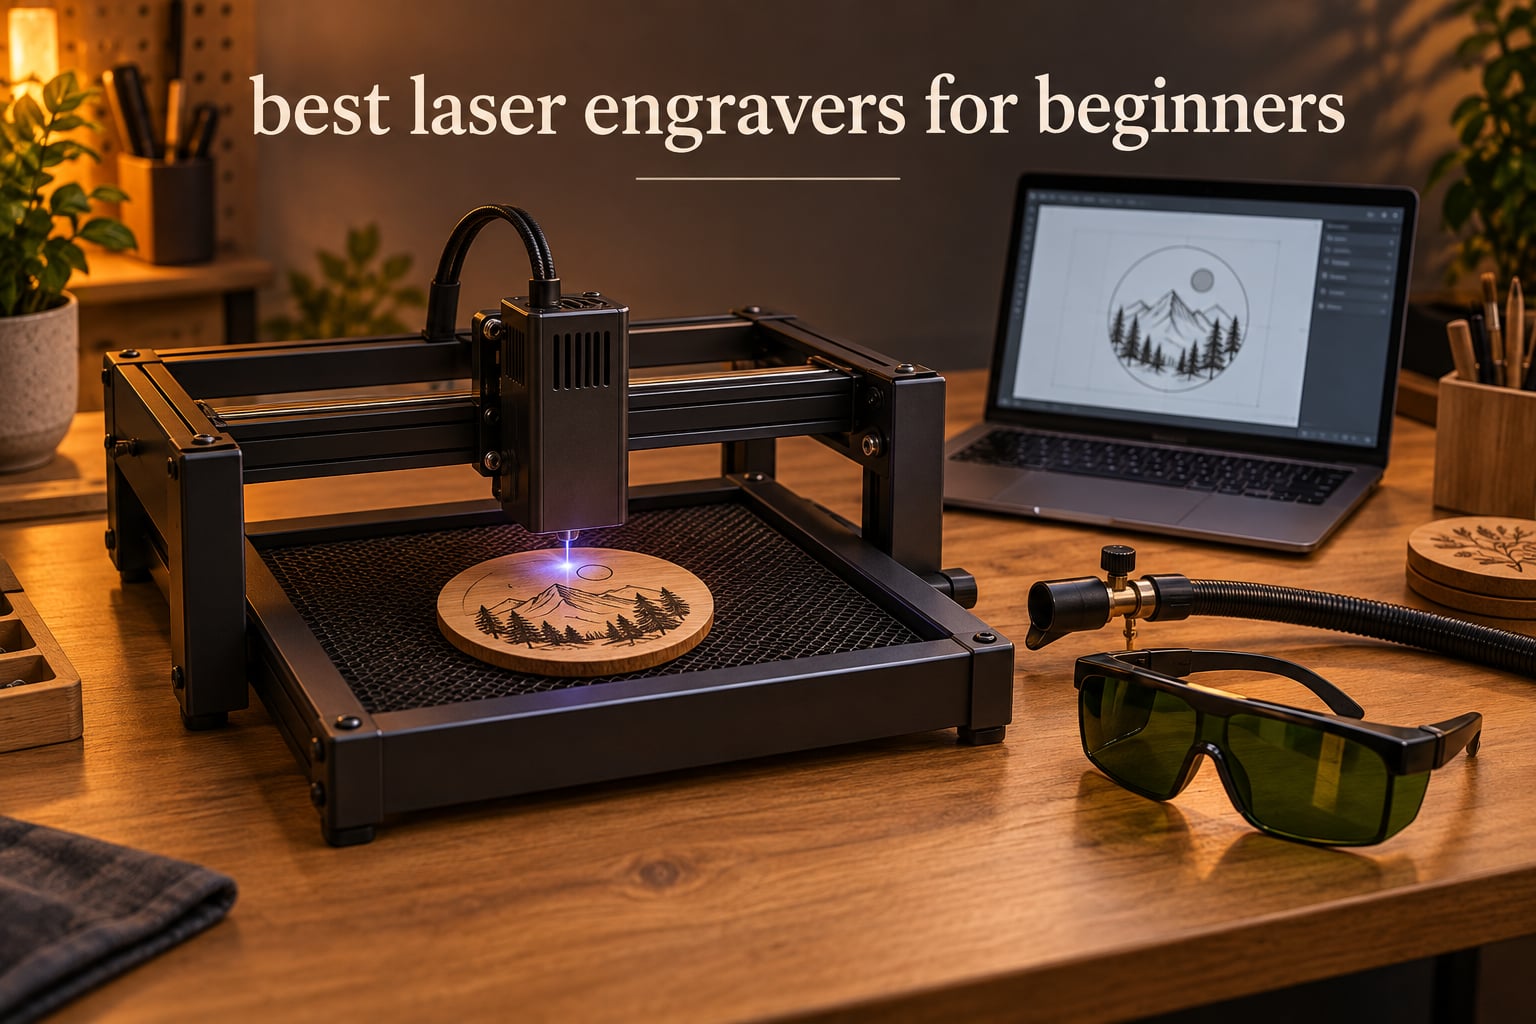
A laser engraver burns a design into wood, acrylic, leather or anodized aluminum with a focused beam instead of a blade, and the gap between a frustrating first month and a satisfying one is almost always the machine you picked. Most first machines that disappoint are not badly made; they are simply the wrong size, the wrong laser type, or an open frame in a room where nobody planned for fumes. That is why we spent weeks reading the specification sheets and the buyer reviews on all ten machines in this roundup before naming a single winner.
Our top pick is the ORTUR Laser Master 2 S2 LU2-10A. It pairs 10W of real optical output with a full industrial metal frame, a 390 x 410mm bed and both LaserGRBL and LightBurn support, a combination none of the other 10W frames here matches, and at 1474 reviews it is also the most thoroughly tested machine in the group. If your first session is happening in a flat, a rented house or a classroom, read the enclosed section instead: the Creality Falcon A1 is the Class 1 option and it changes the safety conversation completely.
We are not affiliated with any of the brands below, and nothing on this page is a paid placement. We picked using four things only: the optical output figure rather than the marketing wattage, the size of the work area against the projects people actually make, the safety hardware that ships in the box, and how many buyers hit real problems. We also treated documentation quality as a product feature, because a machine nobody can set up is not a good first machine. Our list was last checked in 2026 and specifications change as brands revise models, so use the buttons on each card to see the current listing.
One quick note for readers who came here from a different kind of laser: we also review laser levels for construction and office laser printers, which are a completely different category of device. This guide is only about machines that engrave material.
Table of Contents
Top 3 Best Laser Engraver Picks for Beginners (October 2026)

ORTUR Laser Master 2 S2 LU2-10A
- 10W optical output
- 390 x 410mm bed
- Full metal frame
- LaserGRBL and LightBurn

Twotrees TTS-55 Pro
- 5.5W with air-assist nozzle
- 300 x 300mm bed
- Wi-Fi and TF card
- 0.08mm spot
The three machines above cover the three sensible ways to start: a rigid 10W frame you will keep for years, a mid-power machine with an included air-assist nozzle, and a small preassembled box for a desk. Every one of them runs standard G-code files through LaserGRBL or LightBurn, so nothing you learn here transfers badly to a bigger machine later.
Quick Picks for First-Time Laser Engravers
Here is the short version before we get into the details.
Best overall: the ORTUR Laser Master 2 S2 LU2-10A, because 10W of optical output on a rigid metal frame is the combination that survives years of use.
Best value: the Twotrees TTS-55 Pro, which is the highest-rated machine here at 4.4 stars across 494 reviews and comes with a metal air-assist nozzle.
Best on a tight budget: the ACMER S1, arriving 99% preassembled at under 2kg with free software bundled in.
Best for safety in a shared home: the Creality Falcon A1, the only fully enclosed Class 1 machine in this list, so no goggles are needed during normal use.
Best for batch production: the ATOMSTACK A20 Pro V2, whose 20W module and linear guide rails are built for repeated runs rather than one-off gifts.
Two of those five deserve a warning before you commit. The enclosed Falcon A1 is heavy at 28.7 pounds and only takes panels up to 460 x 346mm, and the ACMER S1 is fast to set up but its 130 x 130mm bed will not take a coaster-sized sheet of plywood. Our full reviews explain where each one stops being the right answer.
Laser Engraver Specs Side by Side
Every machine we cover, in one place, with the figures that actually decide whether it fits your projects.
| Product | Specifications | Action |
|---|---|---|
| ORTUR Laser Master 2 S2 LU2-10A |
|
Check Latest Price |
| Twotrees TTS-55 Pro |
|
Check Latest Price |
 ACMER S1 ACMER S1 |
|
Check Latest Price |
 Creality Falcon 10W Creality Falcon 10W |
|
Check Latest Price |
 ATOMSTACK Swift 12W ATOMSTACK Swift 12W |
|
Check Latest Price |
 LONGER Ray5 10W LONGER Ray5 10W |
|
Check Latest Price |
 Creality Falcon A1 10W Creality Falcon A1 10W |
|
Check Latest Price |
 ATOMSTACK A20 Pro V2 ATOMSTACK A20 Pro V2 |
|
Check Latest Price |
 SCULPFUN S6 Pro SCULPFUN S6 Pro |
|
Check Latest Price |
 LONGER Ray5 5W LONGER Ray5 5W |
|
Check Latest Price |
Read the power column carefully. Every machine here publishes an optical output figure, but several listings put a much larger machine input number next to it, and 24W, 72W and 80W machine power against 2.5W or 10W optical output is exactly the comparison that trips people up. That gap is why we ranked on optical output throughout, and we explain it in full below.
How We Chose These Machines
We scored every machine on four things, in this order: honest optical power, work area against realistic project sizes, the safety hardware included in the box, and the volume and severity of buyer complaints.
Optical power came first because it decides whether you can cut anything or only mark surfaces. A machine listed at 24W or 72W machine power but 2.5W or 10W optical output is not lying to the standard of the industry, but it is easy to misread, and the difference is the difference between burning through 3mm acrylic and darkening its surface. Work area came second because the most common beginner regret is a bed that will not take the size of thing they wanted to make, and the most common surprise is how quickly a 130 x 130mm box feels tiny.
Safety hardware ranked third, and it is the reason the Creality Falcon A1 is on this list despite being by far the heaviest machine here. Every other unit in the roundup is an open Class 4 frame that needs wavelength-specific glasses, a lid or box and filtered extraction, and that gear is not in the box. Documentation and support ranked fourth, and we weighted it heavily: several machines here have perfectly good hardware wrapped in instructions that do not match the shipped control board.
On r/Laserengraving and r/lasercutting, the recurring beginner consensus is to start with a 5W to 10W diode machine rather than jumping to a 40W CO2 tube, and the same communities repeatedly point out that the enclosure, air assist, extraction and glasses can cost about as much as the machine. We weighted that heavily too. If you only read one paragraph in this guide, read the safety section before you buy anything, not after.
1. ORTUR Laser Master 2 S2 LU2-10A – Our Top Pick
ORTUR Laser Master 2 S2 LU2-10A Laser Engraver Laser, 10000mW Engraving Cutting Machine, Class 4 High Accuracy Laser Cutter, DIY Laser Marking for Metal
10W optical output
390 x 410mm work area
0.05mm spot
LaserGRBL and LightBurn
Pros
- 10W true optical output with a 0.05 x 0.1mm spot
- Full metal industrial frame resists flex and keeps accuracy
- Modular design makes repair and upgrades straightforward
- G-sensor tilt shutoff and auto laser-off when idle
- 1474 reviews give the deepest owner record in the group
Cons
- Open Class 4 design means eye protection and ventilation are your responsibility
- Weighs 9 pounds and needs a large desk
This is the machine we keep coming back to. The Laser Master 2 has been on sale for years, which means parts, firmware fixes and a large body of owner knowledge all exist for it, and at 1474 reviews averaging 4.2 stars it has the deepest owner record in the group. Roughly two thirds of those buyers give it five stars.
The frame is the reason it lasts. Where most hobby machines use folded steel or a light alloy box, the ORTUR uses a full industrial metal frame, and buyers consistently single out rigidity as the reason their engraving stays accurate after months of use. A rigid frame means the gantry does not flex at the far corners of the bed, which is exactly where a lighter frame shows up as inconsistent burn depth on a large piece.
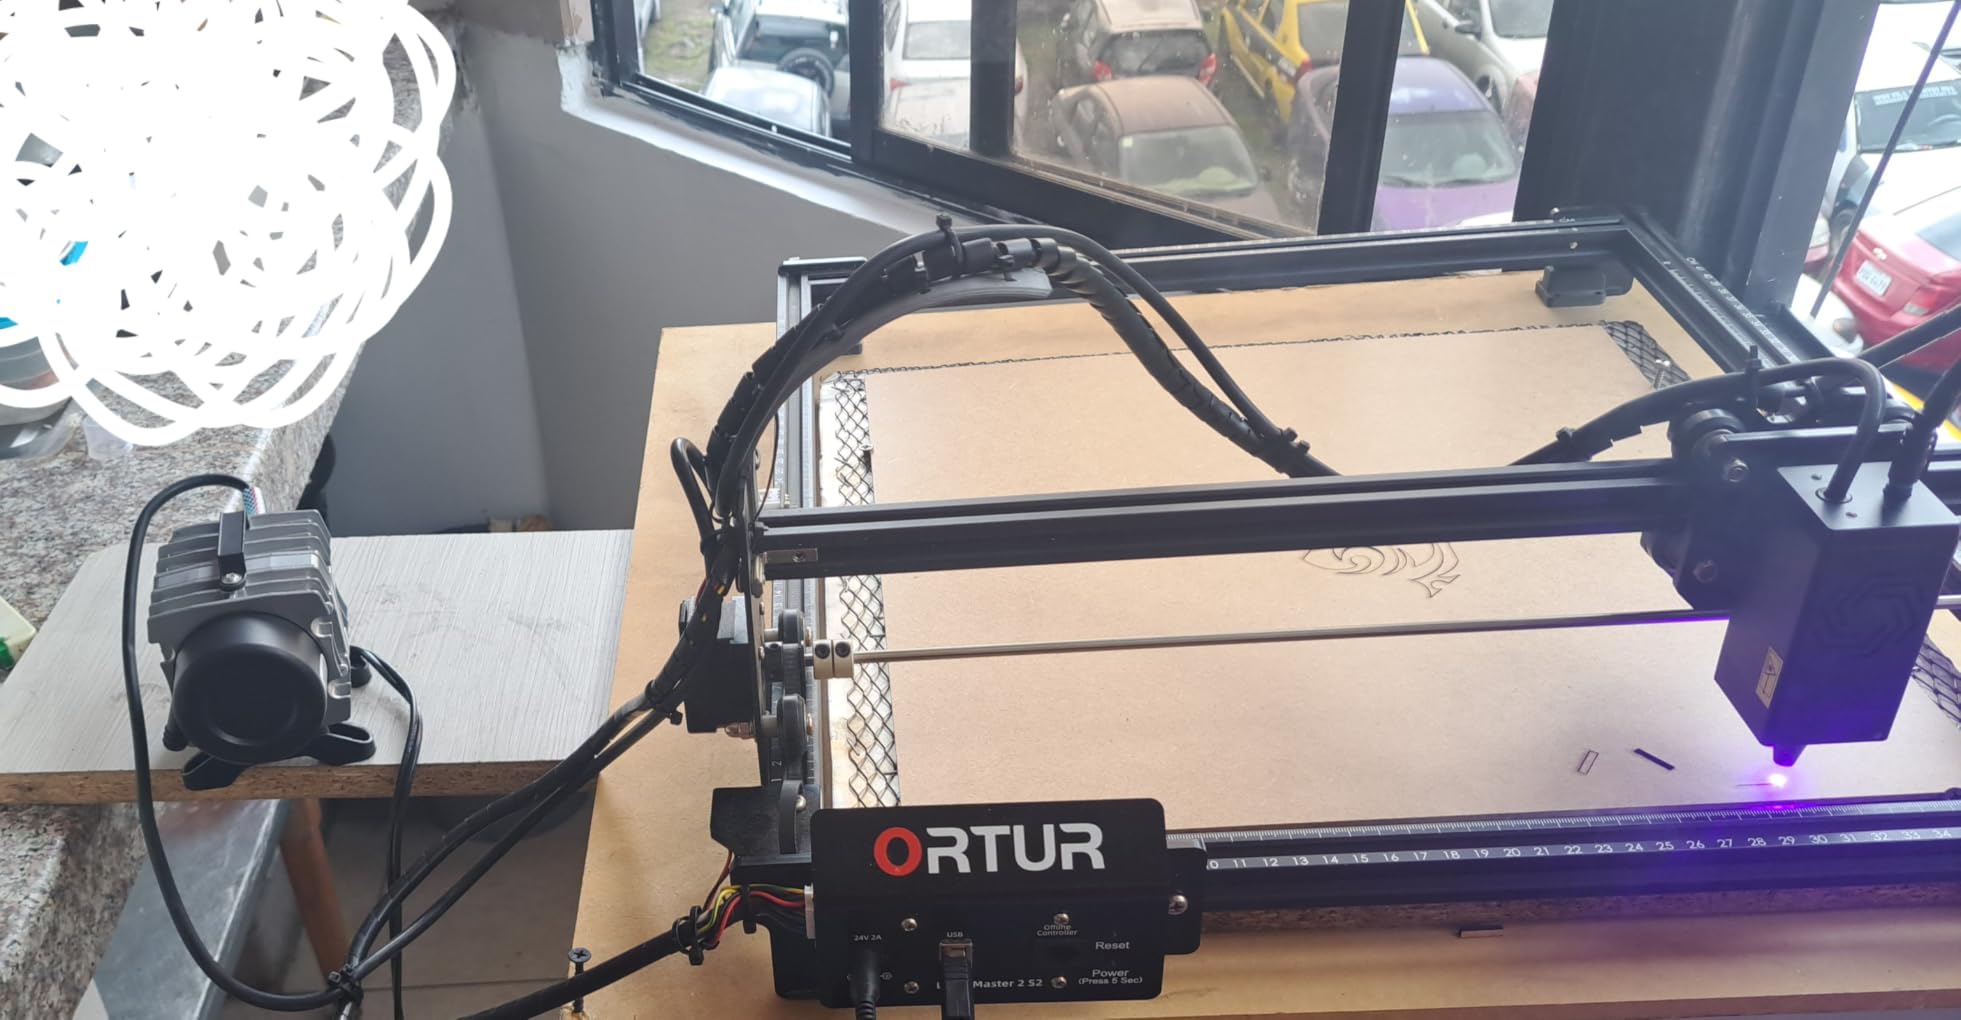
The optical figure is the real headline: 10000mW, not a marketing equivalent. That is enough to cut 30mm acrylic and 20mm wood according to the manufacturer, which means you are not limited to surface marking. The compressed point size of 0.05mm x 0.1mm is fine enough for small text and serial numbers, and the module carries dual-fan cooling with a 235g head so the head itself stays manageable during a long job.
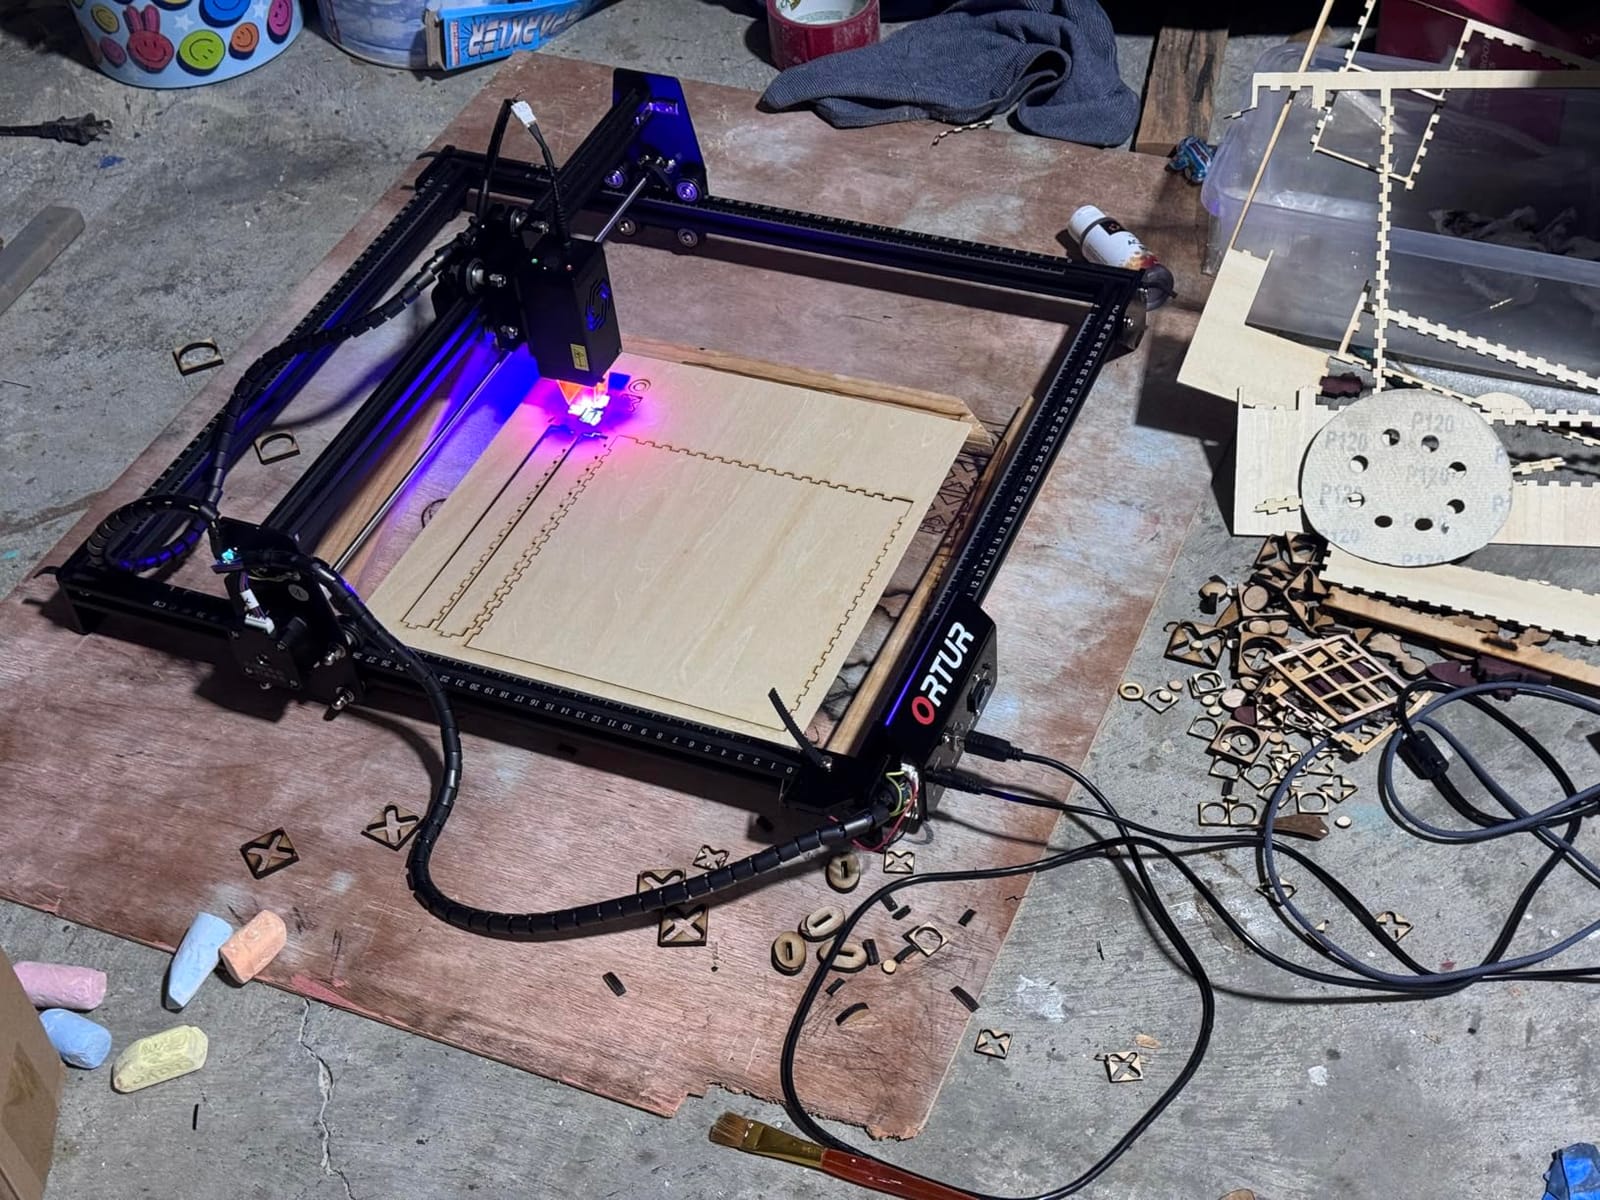
Assembly is reported at 10 to 15 minutes, and the modular layout means a failed part is replaced rather than the whole machine being written off. There is a built-in air-assist interface on the module, so an air pump can be added without rewiring anything.
What it handles better than the alternatives
At 390 x 410mm the bed is one of the larger open frames here, and it sits in a class where most rivals are 300 x 300mm, so a full sheet of small parts fits in one pass. The 20mm wood cutting figure is well beyond anything the 5W and 5.5W machines in this roundup will do, and 30mm acrylic opens up thick signage and layered work that cheaper diodes cannot touch.
Software support is unusually broad. It runs LaserGRBL on Windows and LightBurn on Windows, Mac and Linux, accepts SVG, DXF, JPG, PNG, BMP, TIF and even CR2 files straight from a camera, and auto-zeros via the G-sensor. That file format range matters more than it sounds: importing a raw camera file without editing it first is a real time saver for product photos.
Where you will be disappointed
This is a Class 4 open-frame machine, and the protective cover only filters 98% of UV light. Buyers who expected a plug-in-and-go product report this as the single most common complaint, and it is a fair one. You need 450nm blue glasses, an enclosure or lid, and filtered extraction before you run it indoors, which is why the true starting cost is well above the machine.
The 390 x 410mm bed also means a 22.44 x 21.65 inch footprint at 9 pounds, so it needs a real table rather than a shelf. At 4.2 stars it is not the highest-rated machine here; the 5.5W Twotrees scores higher because it is smaller and simpler, but it will not cut what this cuts.
2. Twotrees TTS-55 Pro – Best Value
Twotrees TTS-55 Pro Laser Engraver 5500mW Laser Engraving Machine
5.5W Class II diode
300 x 300mm area
0.08 x 0.46mm spot
Wi-Fi, TF card and app
Pros
- Highest average rating in the roundup at 4.4 stars
- Metal air-assist nozzle included on the 5500mW module
- 30000mm/min on a dual-core 32-bit board
- Wi-Fi
- TF card offline mode and mobile app control
- Support described as responsive by owners
Cons
- Initial setup is fiddly and may need the frame taken apart more than once
- Engraving bare metal is much weaker than listings suggest
- LightBurn settings take time to dial in
The TTS-55 Pro is the machine we recommend to someone who wants a proper hobby engraver without spending hobbyist money on it, and at 4.4 stars across 494 reviews it holds the best average rating of anything we tested. Seventy-two percent of those buyers give it five stars, and the ones who do are usually describing the air-assist nozzle.
That nozzle is the differentiator. The 5500mW module comes with a metal air-assisted nozzle, and air assist is what pushes smoke and debris away from the beam so a cut edge comes out cleaner and a deep engraving does not turn into a scorch mark. On 5W-class machines it is often sold separately, and buyers consistently report crisper results on leather and plywood because of it.
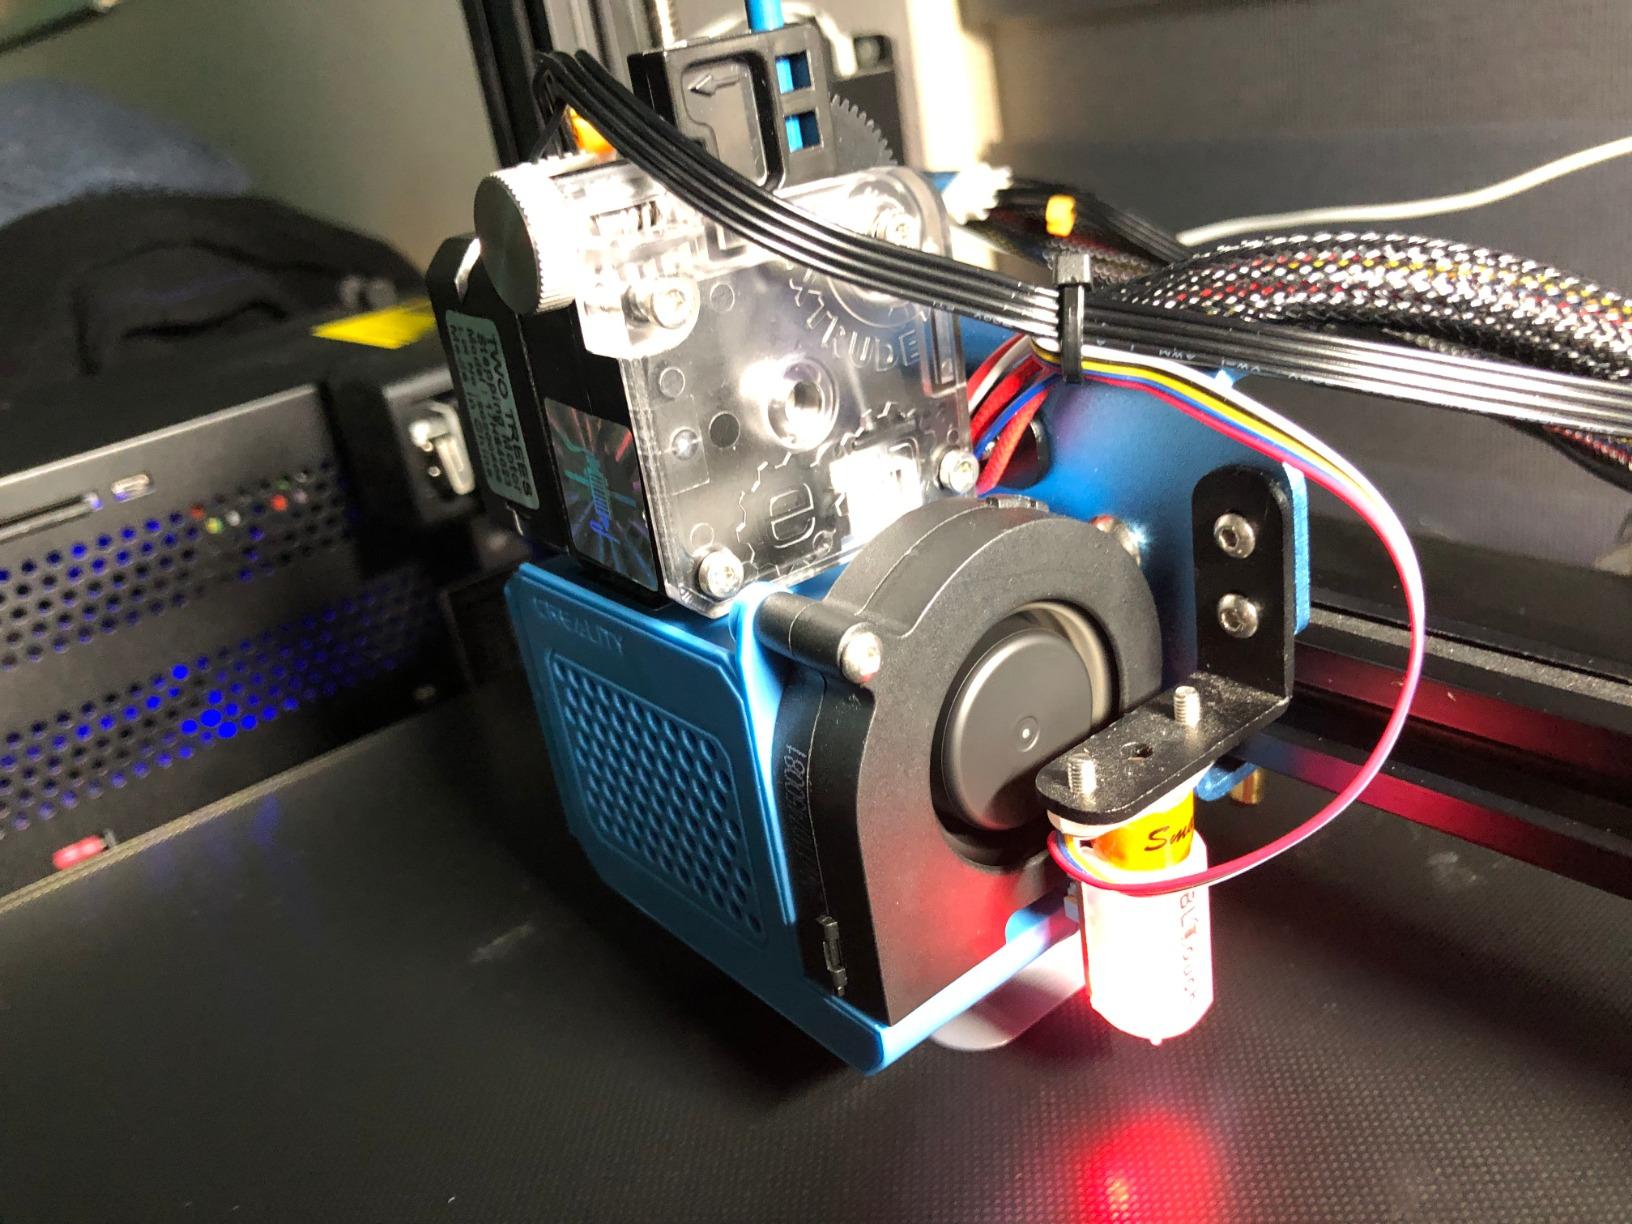
The optics use LD plus a compression lens with a 23mm short focal length, giving a 0.08 x 0.46mm spot and engraving accuracy up to 0.1mm. Owners say it handles wood, leather and acrylic well once you have set it up, and it cuts 5mm plywood, 3mm acrylic and 0.7mm leather according to the spec sheet, which covers most beginner project lists.
Connectivity is unusually generous for the class: USB, built-in Wi-Fi, TF card offline mode and a mobile app, with LaserGRBL on Windows and LightBurn on Windows, macOS and Linux. The dual-core 32-bit controller runs up to 30,000mm/min, which is higher than the 10,000mm/min of the 10W Creality Falcon and the 24,000mm/min of the 10W Ray5.
Why this one and not the Creality Falcon 10W
The Twotrees arrives with the air pump interface and nozzle already on the module, and it scores half a star higher on owner feedback. If your projects are engraving wood, leather and acrylic and you are not trying to cut through stacked material, the extra power of a 10W machine is headroom you will not use for months.
It is also the easier of the two to move at 8.23 pounds and 19.4 inches long, and the Wi-Fi and TF card options mean you can send a job from a phone without sitting at the machine.
The catch: setup and bare metal
Setup is the most common complaint, and it is not a small one: some owners have needed to open the frame and reassemble it more than once before it behaved. Budget an afternoon rather than an evening for your first session, and read the included guides rather than guessing.
More important, this machine does not engrave bare metal well, despite what some listings imply. If your goal is marking stainless steel or anodized aluminum, you will need a coating or marking spray first, which is a step the open-frame 10W machines handle more convincingly. Its 300 x 300mm bed is also smaller than the ORTUR, the LONGER and the Sculpfun.
3. ACMER S1 – Best Budget Pick
ACMER S1 Laser Engraver Machine, 2500mW Lazer Cutter for Wood and Acrylic
2.5W diode, 455nm
130 x 130mm work area
99% preassembled
LightBurn and LaserGRBL
Pros
- Arrives 99% preassembled with a one-minute laser head installation
- Free Acmerstudio software bundled and ready out of the box
- Lightweight 2kg aluminium body is easy to carry and store
- 0.01mm repeatable positioning accuracy
- Works on macOS
- Windows and Linux
Cons
- 130 x 130mm work area is the smallest in the roundup
- Some owners report inconsistent home positioning and false outside-work-area errors
- 2.5W is slow for etching and heavy cutting
If the word beginner means you have never set up a machine like this, the ACMER S1 removes almost every possible obstacle. It arrives 99% assembled, the only real assembly step is a one-minute laser head installation, and the 2kg aluminium frame is light enough to carry between rooms or pack away when guests are coming.
At 4.3 stars across 233 reviews with 73% five-star ratings, the owner experience is consistently positive once running. Buyers single out clean, consistent results on wood, plywood and bamboo after focus and power are dialled in, and several call it strong value for small jobs such as tags, coasters and small plaques.
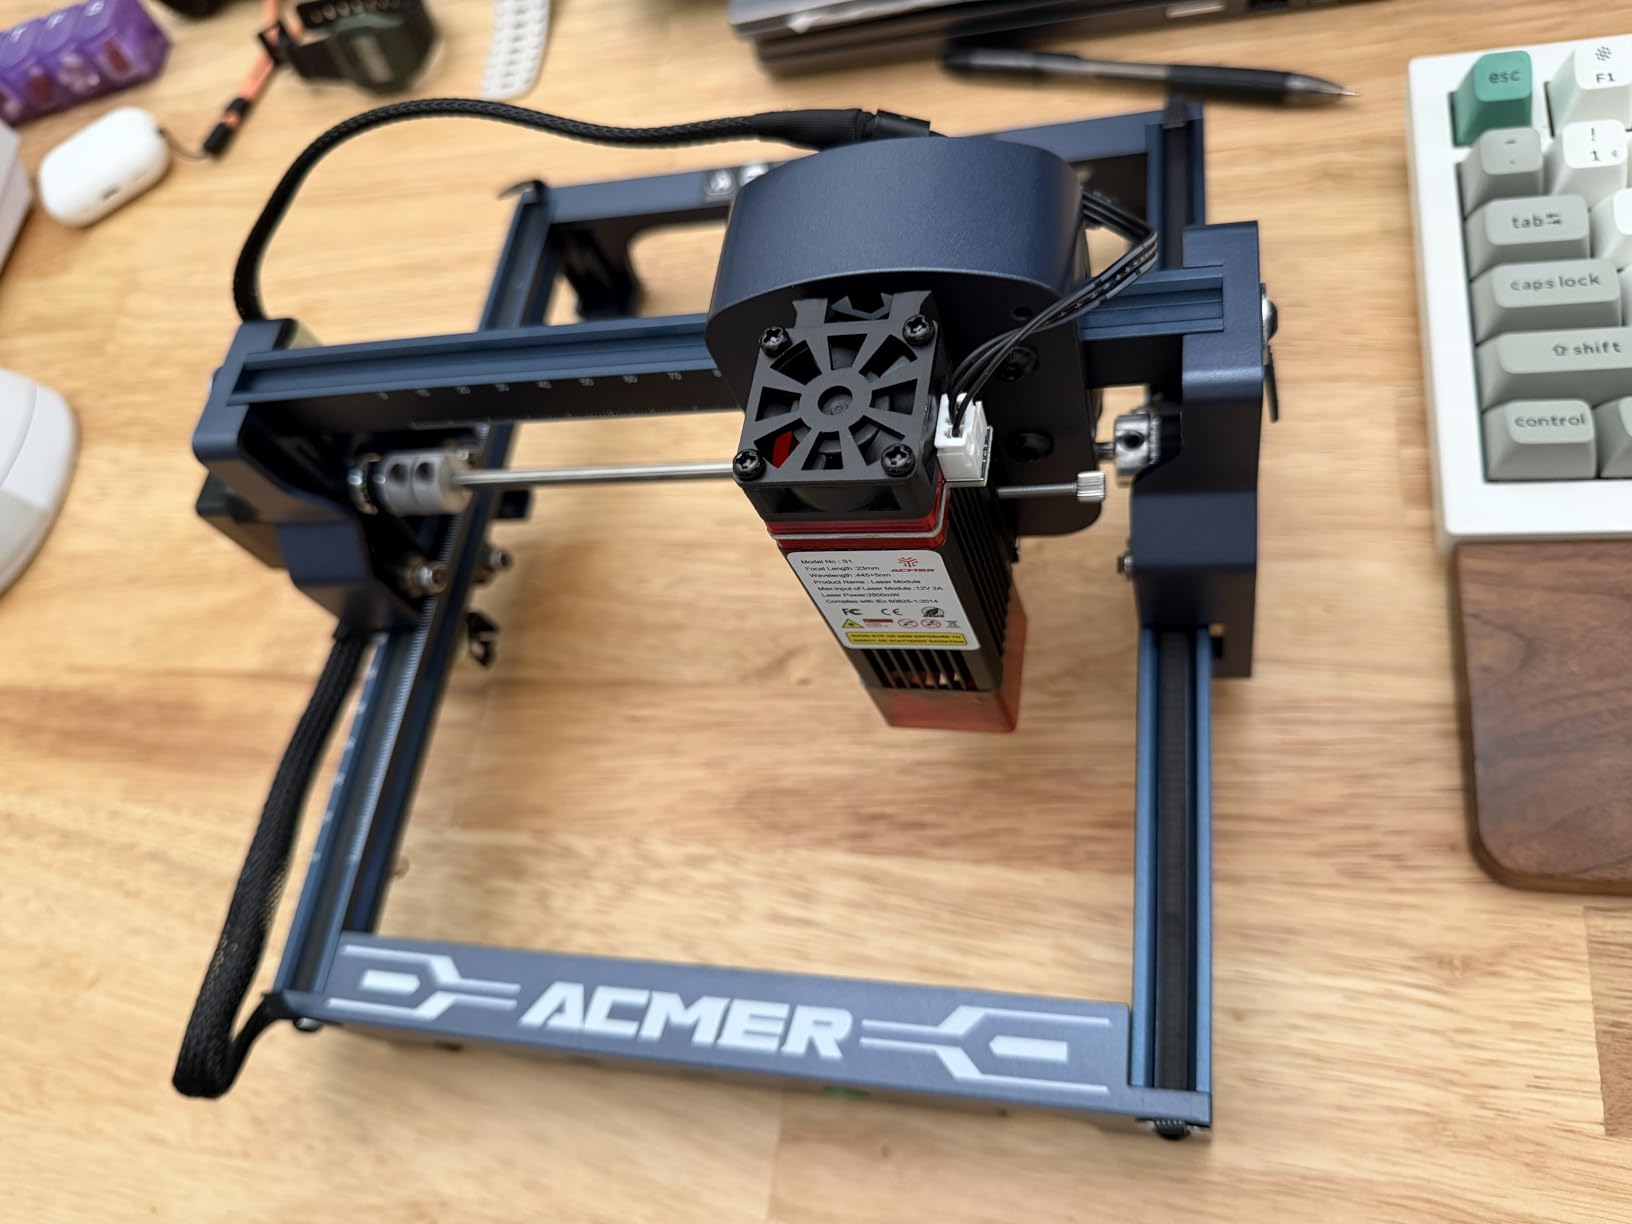
The specification is modest but honest: a 2500mW diode at 455nm, a 2mm focal length, up to 10,000mm/min engraving speed and 0.01mm repeatable positioning accuracy inside a 130 x 130mm work area. It cuts thin plywood, MDF and acrylic, and engraves wood, bamboo, leather, plastic, PCB, aluminium oxide and ceramics. The wavelength matters later, because 450nm is the band your safety glasses must match.
Software is the quiet strength here. Acmerstudio is included free, and both LightBurn and LaserGRBL work, so you are not locked into anything. It is IEC 60825-1 compliant, carries Class 4 certification, and comes with a 12-month warranty.
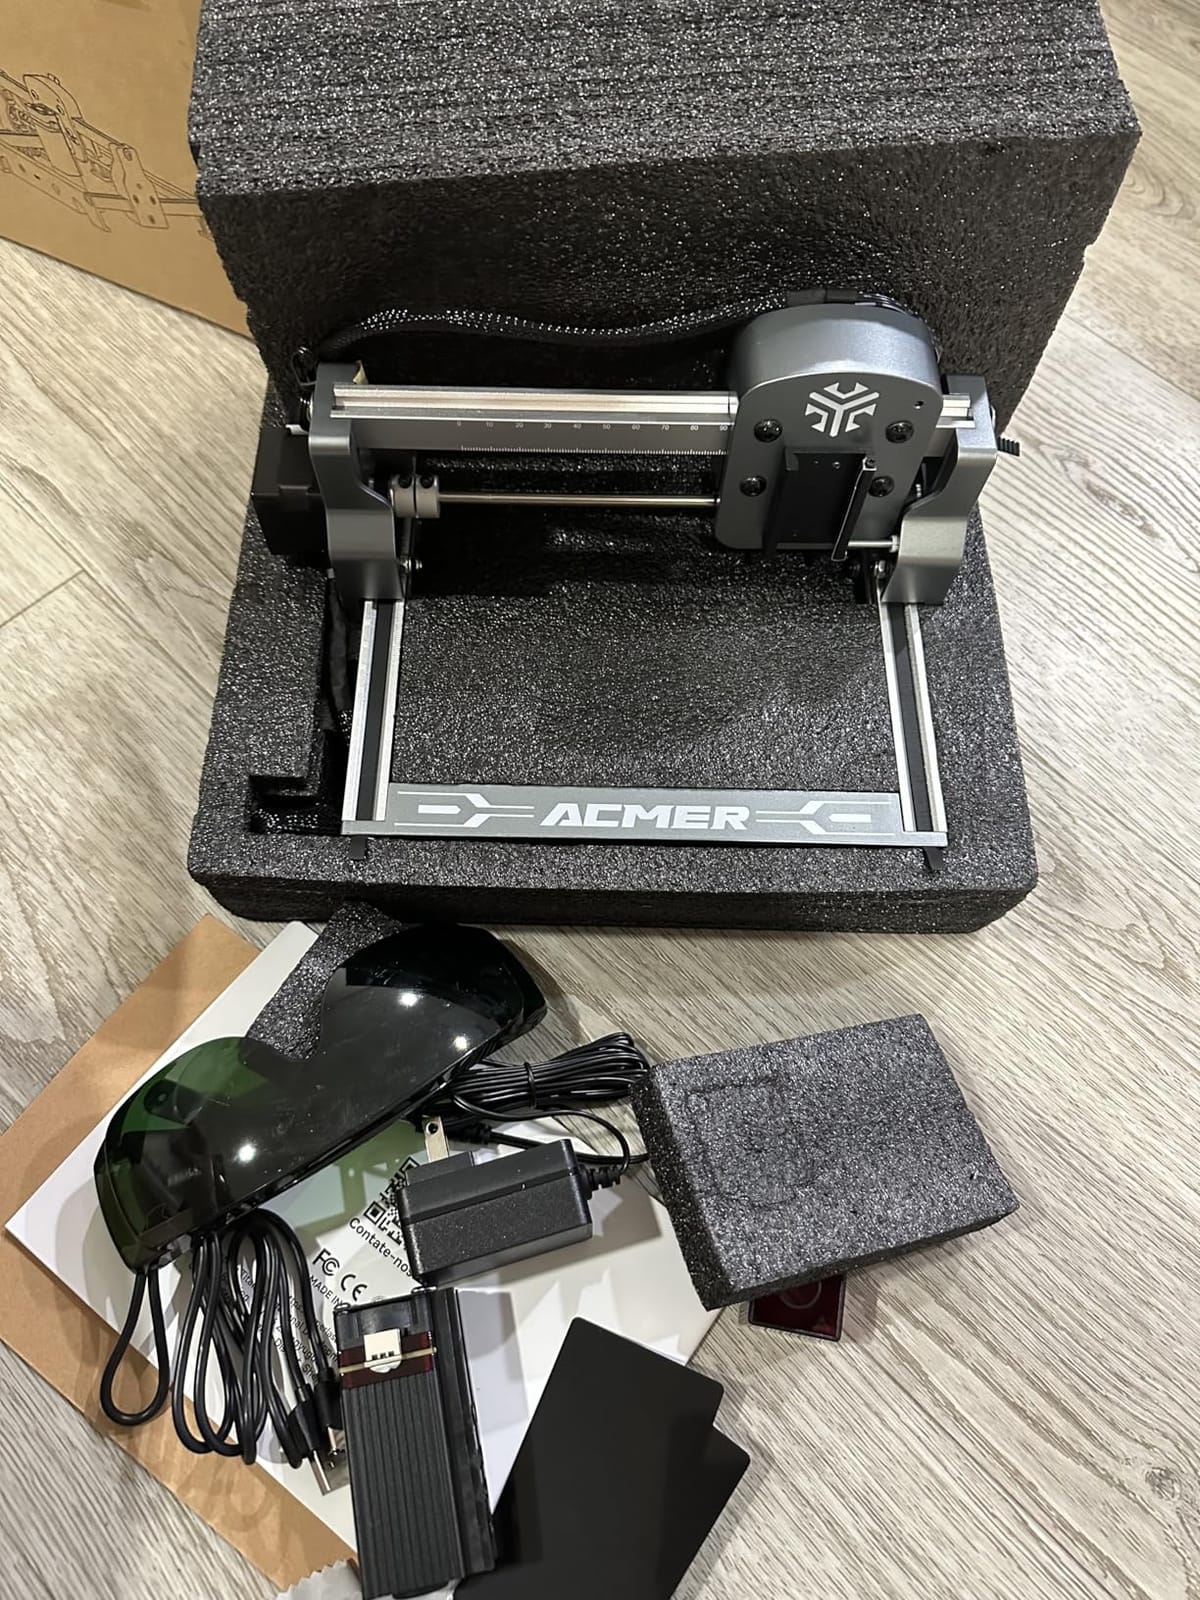
Where the small footprint is a genuine advantage
A 130 x 130mm bed is not a compromise if you are making keychains, pet tags, jewelry pendants or small batch coasters, because you can lay out a whole sheet of blanks and engrave them in one pass. Owners doing exactly that rate the machine very highly, and the 0.01mm repeatability means the second tag comes out identical to the first.
It is also the machine we would put in a classroom or a dorm, since it is small, light and cheap to replace if something goes wrong. Free bundled software removes the licensing conversation entirely.
Where the small footprint becomes the problem
There is no sign, panel or coaster-sized sheet of plywood in this roundup that fits 130 x 130mm comfortably, so the first thing most owners do after a few weeks is save towards a bigger machine. At 2.5W, etching is also slow, and several owners report that the speed is the limit rather than the quality.
The most annoying recurring issue is positional reliability: some owners report inconsistent home positioning and false outside-work-area alarms mid-job. That is usually solved by a firmware check and re-homing, but it interrupts work at the worst moment, and it is the main reason we did not put this machine at number one despite its rating.
4. Creality Falcon 10W – Best for First Cuts
Creality Laser Engraver Machine 10W Output Power, 72W DIY Laser Engraving Machine 0.06mm High Precision Laser Cutter and Engraver for Wood and Metal, Paper, Acrylic, Glass, Leather etc, 17″ x 16″
10W output
0.06 x 0.06mm spot
Basswood and acrylic in one pass
Wi-Fi, USB and SD card
Pros
- 10W output cuts 5mm basswood or 3mm black acrylic in a single pass
- 0.06mm spot gives precise clean detail on small text
- Rigid all-aluminium frame with steel wheel guide rails and belt tension adjustment
- Tool-free focusing plate speeds up setup
- One year of free parts replacement plus technical support
Cons
- Roughly 10 to 20 minutes of assembly before first use
- Open frame still needs UV eye protection and ventilation
- Air assist pump and rotary kit are separate variant options
This is the machine we would hand to someone whose ambition is to cut things rather than mark them. Ten watts of optical output, a 0.06 x 0.06mm spot and a manufacturer claim of single-pass cutting through 5mm basswood or 3mm black acrylic at up to 10,000mm/min is a genuinely different capability from the 5W class.
At 4.2 stars across 223 reviews, the feedback is mostly about cut quality and the frame. Buyers highlight the single-pass cutting and the precision of the spot, and the all-aluminium alloy frame with steel shaft wheel guide rails and belt tension adjustment is repeatedly credited for holding repeatability over time. The tool-free focusing plate on the head is a small detail that saves real frustration.
Transfer options cover Wi-Fi, USB cable and SD card, and the software story is LaserGRBL on Windows plus LightBurn on Windows, Mac and Linux, so the same files you make anywhere will run here. An anti-UV filter acrylic on the module filters 97% of UV rays, which reduces glare but does not make an open frame safe to look into.
One detail worth knowing before you buy: the listings are split into variants, and the Falcon Pro with air assist pump or the Pro with rotary roller kit are different products from the basic unit. If you want clean cuts you will want the air assist variant, and if you plan to engrave tumblers you will want the roller kit.
Why this is the best first cutter
Ten watts is the practical step up. It is enough that a beginner can cut shapes out of wood and acrylic on day one, which is the moment most people decide whether they enjoy this hobby, and it is still small enough to live on a desk at 7.05 pounds and 22.36 x 24.88 inches.
The precision is what separates it from cheaper frames. A 0.06mm spot on small serial text or a product logo is the difference between a mark that looks printed and one that looks scorched, and buyers mention exactly that in their reviews.
Why you might skip it
Assembly takes 10 to 20 minutes before first use, which is fine but not instant, and the open frame means you still need glasses and extraction. The bigger practical issue is variant confusion: the air assist pump and rotary kit are not included by default, so a buyer who assumes they are will be disappointed on their first cut.
It also shares a bed size with the 5.5W Twotrees, so if you are choosing between the two, the deciding question is whether you want to cut sheet material. If your projects are engraving rather than cutting, the Twotrees TTS-55 Pro is the better spend.
5. ATOMSTACK Swift 12W – Best for Fast Engraving
ATOMSTACK Swift 12W Laser Engraver Cutter for Wood & Metal
12W output
300 x 300mm area
0.06 x 0.08mm spot
Up to 400mm/s
Pros
- 12W module with a tight 0.06 x 0.08mm compressed spot
- Engraving speeds up to 400mm/s shorten batch job times
- Quick and straightforward assembly
- Works with LightBurn
- LaserGRBL and the brand app
- 365-day warranty with 24/7 technical support
Cons
- A portion of buyers report reliability and consistency issues
- One-star reviews make up about 16% of ratings
- Protective cover is removable so eye protection discipline is on the user
The Swift 12W is one of the fastest engraving machines in this roundup, and speed is a feature that matters more than beginners expect. At up to 400mm/s it can finish a sheet of keychain blanks well before a 5W machine is on its second row, and that difference compounds across a full production run.
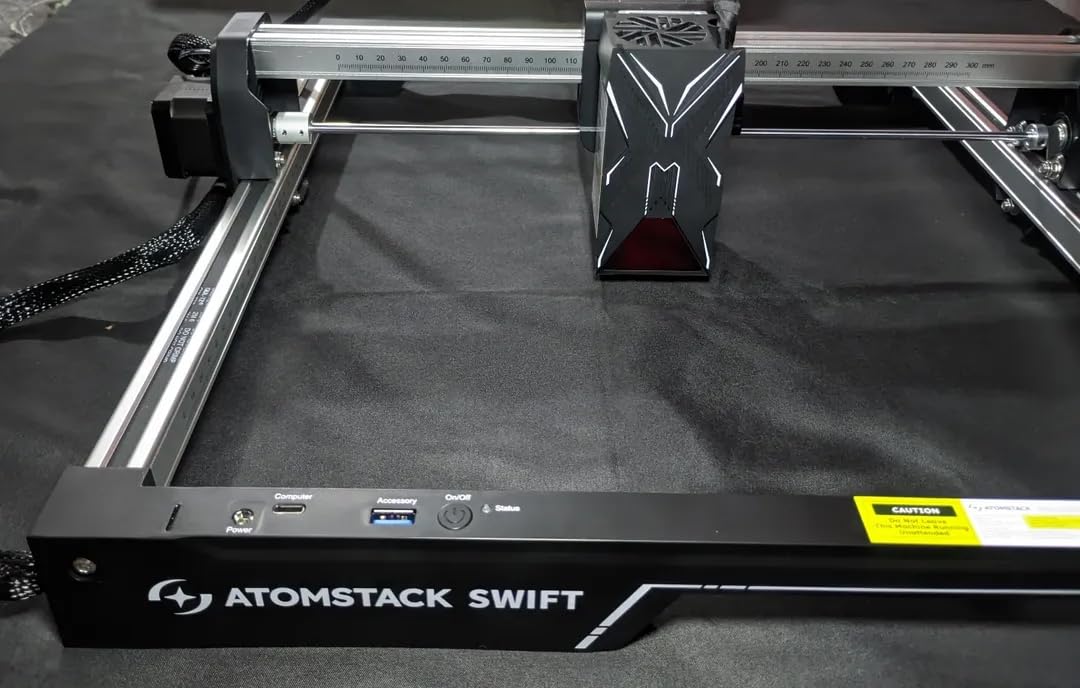
Twelve watts of output with double pressure point coupling gives a 0.06 x 0.08mm spot, which is fine enough for small text and tight detail, and the machine sits on a 300 x 300mm working area. Assembly is quick, and a built-in screw rod and long focal length help the bed stay square over time. Connectivity covers Type-C and USB, with LightBurn, LaserGRBL and the brand’s own app and PC software all supported.
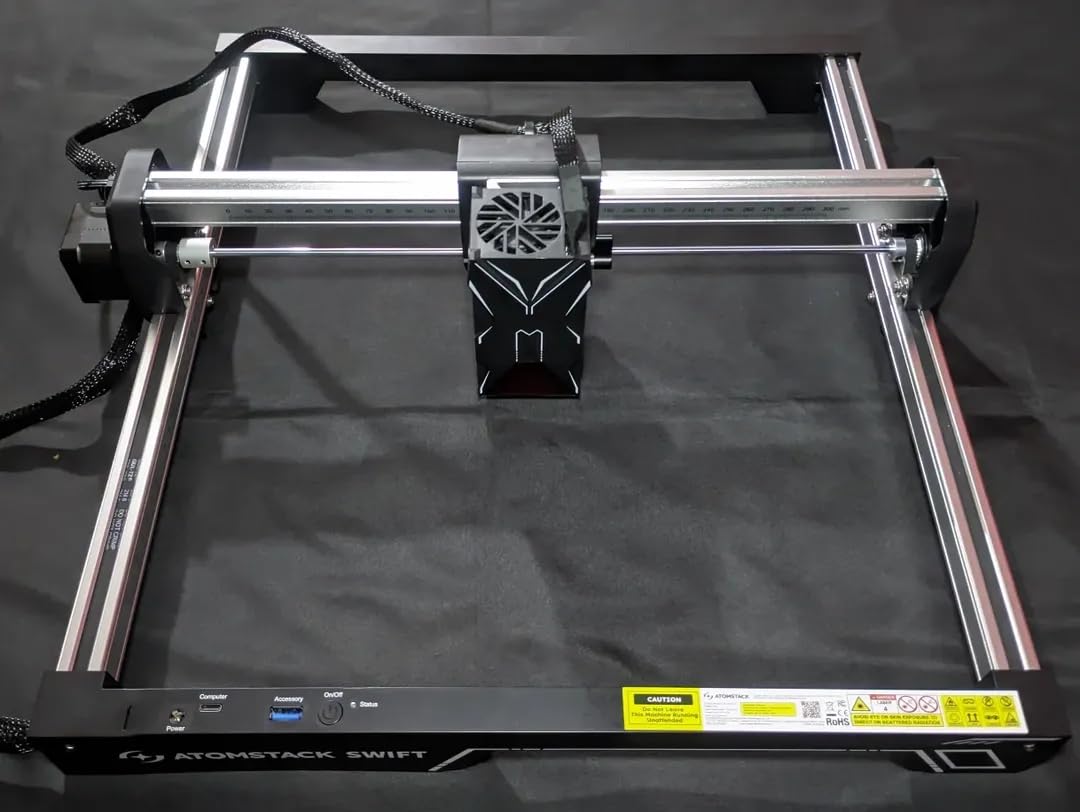
The 365-day warranty and 24/7 support stand out in a segment where support is often thin, and a removable magnetic laser protective cover plus safety glasses are included in the box. That combination of warranty, glasses and a detachable cover makes it a reasonable first machine for someone who will actually use it.
At 4.1 stars across 124 reviews, 67% of buyers give five stars but roughly 16% give one star, and reviewers who do complain tend to describe reliability and consistency rather than a specific fault. That pattern usually points to variation between production batches rather than a design flaw, so warranty terms matter more for this machine than for the others.
Who should buy this machine
If you already know you will be making batches rather than single gifts, the speed advantage is real and it is the whole reason to choose this over a slower 10W frame. A removable magnetic cover also makes it easy to swap between marking and a vented cutting configuration, which is useful if you move between materials.
It is also a good second machine. If you start on something smaller and then want throughput for a small side business, this is a step up that does not require learning a new software ecosystem.
Who should not buy this machine
If this is your very first machine and you have never used control software, the uneven reliability reports are more expensive in frustration than they are in money. And because the protective cover is removable, this is not the machine to buy if your workspace is shared with children or pets and you might get distracted.
The 300 x 300mm bed is also mid-sized rather than generous, so if your project list includes signs or wall panels, the LONGER Ray5 10W or the Sculpfun S6 Pro gives you more room for a similar spend.
6. LONGER Ray5 10W – Best for Large Projects
LONGER Ray5 Laser Engraver and Cutter Machine,10W Laser Engraver, 400×400mm
10W dual-beam module
400 x 400mm work area
3.5-inch touchscreen
Up to 24,000mm/min
Pros
- 400 x 400mm work area takes a full standard sheet
- 3.5-inch touchscreen allows monitoring and parameter changes without a computer
- 0.06mm spot at up to 24000mm/min
- Emergency stop
- motion protection and overheat detection built in
- One controller can drive multiple machines
Cons
- Firmware and screen updates can be buggy with wrong-file and dead-link issues
- Instructions often do not match the shipped machine or newer control boards
- Cooling fan in the laser head is noticeably loud
- Some reports of homing
- Y-axis and alarm faults out of the box
The Ray5 10W has the biggest work area of any open-frame machine we reviewed, at 400 x 400mm, and for a beginner that matters more than raw power. A 400 x 400mm bed takes a full sheet of standard material, which means you can cut a batch of coasters, hang a whole sign panel, or engrave a large board in one setup instead of tiling it.
It is one of only two machines in this roundup with a 3.5-inch touchscreen, and that lets you change speed or power without going back to the computer. Owners who are not confident with G-code and laser control software find that reassuring, and it is a real advantage over the ones that need a laptop running LightBurn.
On paper the specification is strong: a 10W dual-beam module, a 240MHz ESP32 multi-core processor, speeds up to 24,000mm/min, a 0.06 x 0.06mm spot and 0.01mm engraving accuracy. The dual-beam module means two laser dots working together, which doubles cutting speed compared with a single-beam equivalent. Connectivity covers USB, TF card, Wi-Fi and an app, and safety hardware includes an emergency stop, motion protection, overheat detection, protective covers and goggles.
The specification is not the problem here. The problem is consistency of experience, and this is the one machine where we would want you to read the reviews before buying. At 4.0 stars across 176 reviews it has the lowest average in the roundup, with 62% five-star but a 15% one-star share, and the complaints are specific and technical: firmware and screen updates going wrong with wrong-file and dead-link errors, instructions that do not match the shipped machine or newer control boards, a noticeably loud cooling fan in the laser head, and some machines reporting homing, Y-axis motion and alarm faults straight out of the box.
Why the bed size is worth the trade-offs
If your projects include signs, decor panels or a production run of blanks, a 400 x 400mm bed removes an entire category of frustration. You stop splitting files, you stop re-homing between passes, and you stop getting burn inconsistency where two separately engraved halves meet.
The touchscreen and the multi-machine capability of the ESP32 controller also matter if you plan to grow. Being able to drive more than one machine from one controller is unusual at this level and cuts down on software juggling later.
Why you might choose a different machine
The 10W LONGER versus the 10W Creality Falcon is a real choice here, and it comes down to your patience with firmware. The Creality is simpler in its software environment and has a cleaner owner record at 4.2 stars, while the LONGER trades that for a bed that takes a standard full sheet and a built-in screen.
At 9.38 pounds and 24.5 x 12 x 5 inches it is also one of the bigger open frames to table-mount, and the loud head fan is worth considering if you plan to work late at night in shared accommodation. Check that your files and setup are backed up before an update, because the update process is the most common source of trouble.
7. Creality Falcon A1 10W – Best for Safety
Creality Falcon A1 10W Laser Engraver, 80W Powerful Output, Fully Enclosed, 600mm/s Speed, HD Camera Auto Positioning, Pre-Assembled&Smart Material Recognition, Ideal for Wood & Metal, Class 1 Safety
Fully enclosed Class 1
10W output
600mm/s CoreXY
HD camera auto-positioning
Pros
- Arrives fully assembled so new users can engrave immediately
- Enclosed Class 1 body blocks 99% of laser light so no goggles are needed
- HD camera with automatic material recognition and positioning removes manual setup guesswork
- CoreXY motion at 600mm/s with 0.05mm engraving accuracy
- Double-door design with clear panels for easy loading
Cons
- Only accepts 460 x 346mm honeycomb panels
- Engraving mirror-finished metals and mirrored acrylic is prohibited
- 28.7-pound footprint is not portable
- Roller kit for tumblers is a separate purchase
This is the machine we would put in a house with children, in a flat where fumes cannot be vented out of a window, or in a classroom. It ships in a category of its own, because it is the only fully enclosed machine in the roundup. It carries Class 1 certification, and the enclosure blocks 99% of the laser light, which means no goggles are required during normal operation. That single fact removes the majority of the safety guidance in the rest of this article.
It also arrives fully assembled. On every other machine here, assembly and setup are the first hurdle, and for a beginner those first ninety minutes decide whether the hobby sticks. The Falcon A1 arrives ready to run, and the HD camera with automatic material recognition and auto-positioning handles the alignment work that beginners usually get wrong on their first ten jobs.

Underneath, the motion system is genuinely good rather than adequate. A CoreXY structure runs at up to 600mm/s with 0.05mm engraving accuracy, and it cuts 6mm wood in a single pass. The emergency stop button and auto-pause when the lid is opened are the two safety features we look for first, and the double-door design with transparent top and side panels means you can watch the job and load material without opening the enclosure mid-cut.
It works with 460 x 346mm honeycomb panels, and the software covers Falcon Design Space, LightBurn and LaserGRBL, so you are not locked out of the standard toolchain. At 4.1 stars across 147 reviews with 65% five-star ratings, buyers consistently highlight the zero-assembly start and the camera-assisted setup as the reason it feels beginner-proof.
Why the enclosure is worth more than power
An enclosed Class 1 machine changes what you can do indoors. You are not managing a visible beam, you are not buying wavelength-specific glasses before the first burn, and the enclosure contains the smoke and noise that make open-frame machines impractical in a small space. For a beginner in rented accommodation, that is not a luxury feature; it is the difference between using the machine and hiding it in a cupboard.
The camera-based material recognition and auto-positioning also flatten the learning curve dramatically, because the most common first-project failure is a job that starts slightly off position and produces a smudged result you cannot explain.
Why it is not the right pick for everyone
It weighs 28.7 pounds and measures 30 x 25 x 15 inches, so it is a floor or dedicated-table machine, not a desk one. The fixed honeycomb panel size of 460 x 346mm also means material larger than that will not go in, so oversized signage is off the table.
There is a hard prohibition on engraving highly reflective materials such as mirror-finished metals and mirrored acrylic, which rules out a common beginner experiment. And if you want to engrave tumblers and bottles you will need the optional roller kit as an extra. For a beginner who wants to make jewelry, coasters and gifts, it is the least demanding machine on this list; for a beginner who wants to cut plywood, the open-frame 10W options are faster and cheaper.
8. ATOMSTACK A20 Pro V2 – Best for Production Runs
ATOMSTACK 20W Laser Engraver, A20 PRO V2 Laser Cutter, High Accuracy Laser Engraving Machine for Personalized Gifts, Business Cards, Wood, Metal, Acrylic, Leather
20W Class 4 output
0.08 x 0.1mm spot
Up to 400mm/s
Linear guide motion
Pros
- 20W laser output
- the highest optical power in the roundup
- Integrated linear guide rails give a more precise build than belt-only frames
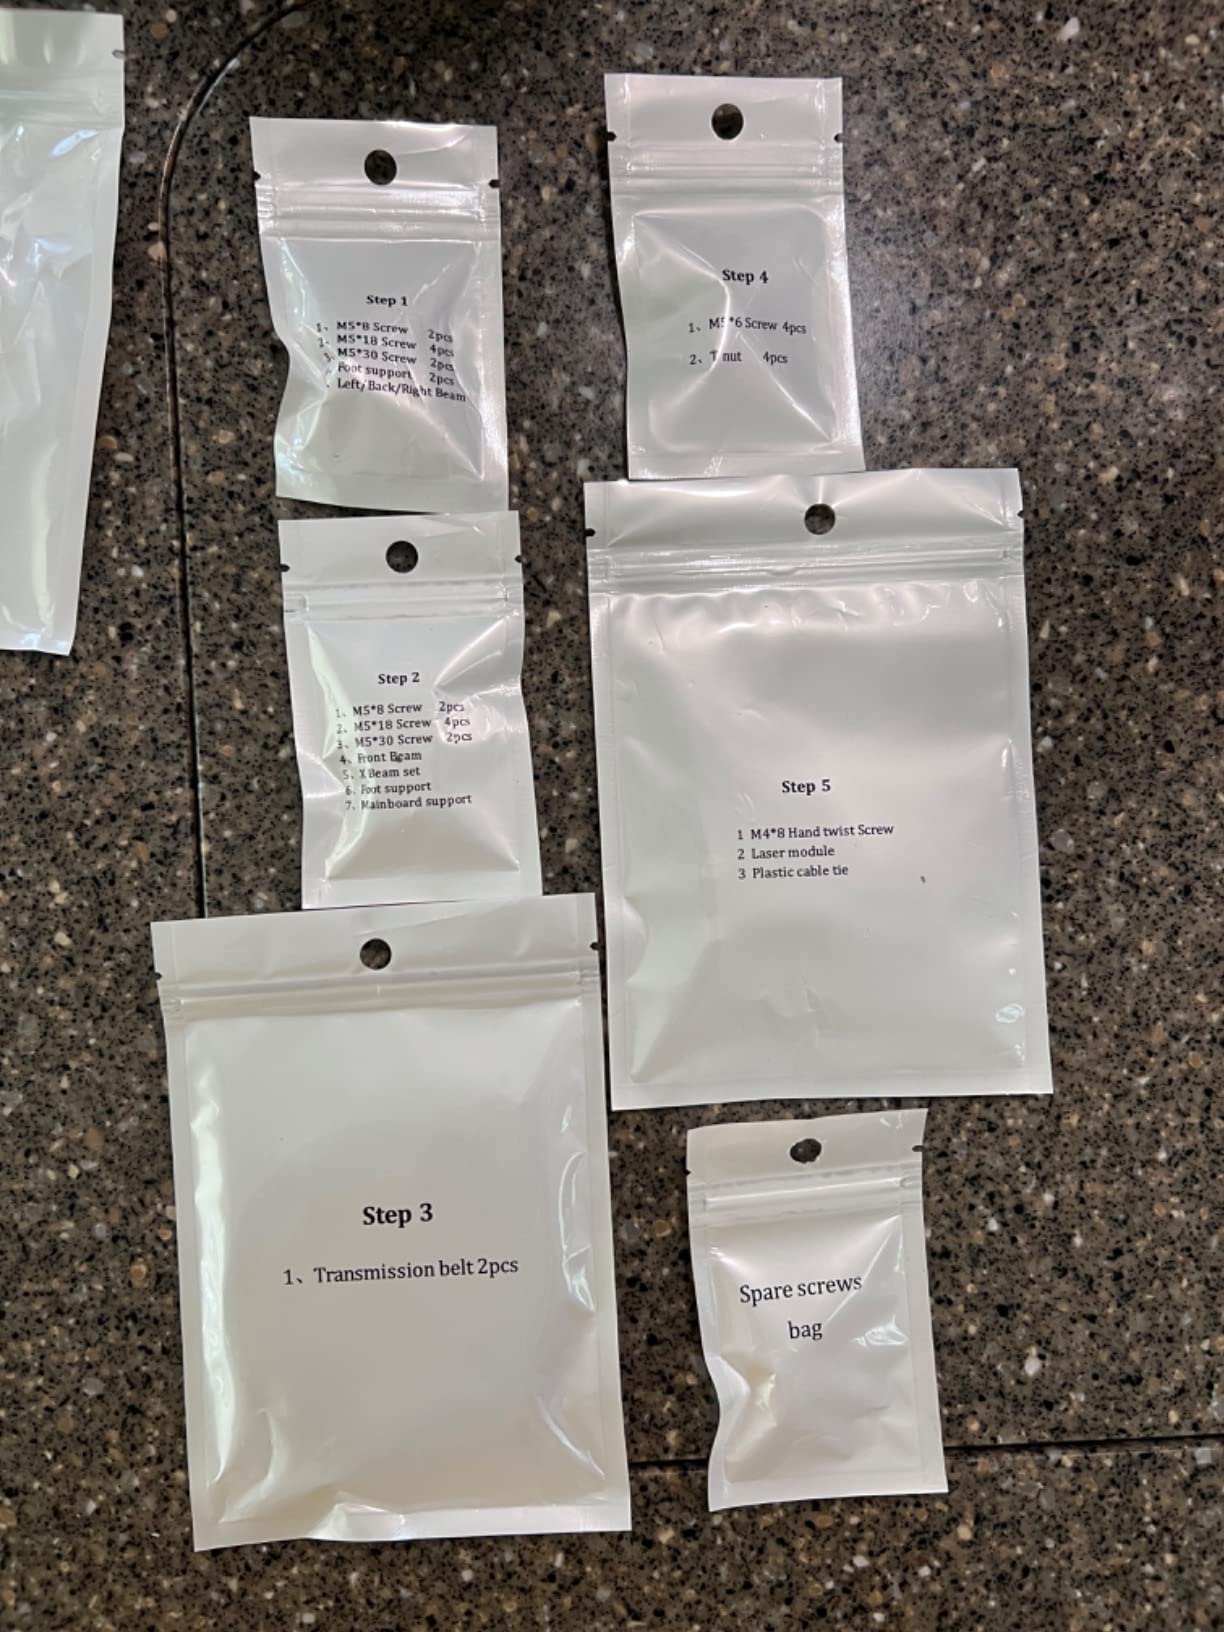
- Quick assembly following the pictured bagged parts guide
- 0.01mm engraving accuracy suits batch repeatability
Cons
- Very little documentation for the air pump
- limit switches
- Wi-Fi and controller
- Free bundled app and PC software are basic compared with LightBurn
- Gantry wiring loom is not held in drag-chain holders
- Belt-driven design is less accurate on large items
Twenty watts is the highest optical output in this roundup, and it is the reason to buy this machine if you intend to sell what you make. A 20W module cuts wood, acrylic and thinner metal in fewer passes than anything else here, which directly cuts the time per item, and time per item is the number that decides whether a small business makes sense.
The build is better specified than the price suggests. An integrated linear guide motion structure on an aluminium alloy frame replaces the belt-only gantry found on cheaper machines, and a modular design means parts can be replaced individually. The dot compression spot is 0.08 x 0.1mm with 0.01mm engraving accuracy, and speeds run up to 400mm/s.
Safety hardware is unusually complete for an open frame: built-in limit switches, a cross-line light for alignment, a removable magnetic protective cover, safety glasses, and a tilt angle safety beep that triggers above 15 degrees. The module has a rated lifespan of up to 10000 hours, which is the only longevity figure published by any brand in this roundup.
Owners rate it at 4.2 stars across 134 reviews with 70% five-star ratings, and the praise is consistent about build quality, assembly speed and cutting power. Most of them run it on LightBurn rather than the bundled software, and reviewers who moved to LightBurn report a much better experience.
Who this machine is for
If you are moving past gifts toward orders, the linear guide structure is the detail that matters. Rails do not stretch and do not need re-tensioning, so the accuracy you calibrate on day one is closer to the accuracy you have at item 500, and that is exactly what a paid order needs.
The 20W module also reduces the number of passes per piece, which cuts both job time and the amount of scorch on the surrounding material. The tilt alarm and limit switches are helpful if you will be running batches unattended while you do something else.
Who should not buy it
Documentation is the biggest real drawback. Owners report very little guidance for the air pump, limit switches, Wi-Fi and controller setup, and the free ATOMSTACK app and PC software are basic enough that many buyers end up buying LightBurn anyway. Budget for that in your real starting cost.
Two build details also put off careful buyers: the gantry wiring loom is not held in drag-chain holders, so cables can snag during a long job, and the belt-driven elements are less accurate on large items than the linear guides are. There are also a small number of reports of machines arriving with smoking electronics and not being replaced by the brand, which is a support question worth asking about before you order rather than after.
9. SCULPFUN S6 Pro – Best for a Big Bed on a Budget
SCULPFUN S6 Pro 5500mW Laser Engraver & Cutter for Beginners
5.5W diode
410 x 420mm engraving area
0.08mm square spot
98% UV filter cover
Pros
- 0.08mm ultra-fine square focus at 5.5W
- Large 410 x 420mm engraving area
- Sliding fixed-focus lens means no screwdrivers to focus
- 98% UV filter cover lets you watch the job more comfortably
- Assembles in roughly 10 to 20 minutes
Cons
- Honeycomb working bed is sold separately
- LaserGRBL is free but function-limited and LightBurn is a paid upgrade
- Stainless steel needs a blackened non-reflective surface to engrave clearly
The S6 Pro does something none of the other 5W-class machines manage: it puts a genuinely large bed on an entry-level diode. At 410 x 420mm it is the largest engraving area in this roundup, bigger than the 400 x 400mm LONGER models and the 390 x 410mm ORTUR. For a beginner making signs and coasters, that is the dimension that limits your projects far more often than wattage does.
The 5500mW diode module with spot compression produces an ultra-fine square 0.08mm focus, and it cuts 10mm wood, 6mm black acrylic and 6mm plywood, which is deeper than the 5W machines here can manage. The fixed focus lens with a sliding laser head means you focus it by hand without a screwdriver, and assembly takes 10 to 20 minutes following the manual.
Two small design touches are worth more than they sound. Vertical scale lines on both axes let you position material by eye instead of measuring twice, and a front-mounted X-axis power switch means you can cut power without reaching behind the machine. The laser filter cover blocks 98% of UV light, so you can watch the job without glasses on, which is a comfort benefit rather than a safety guarantee.
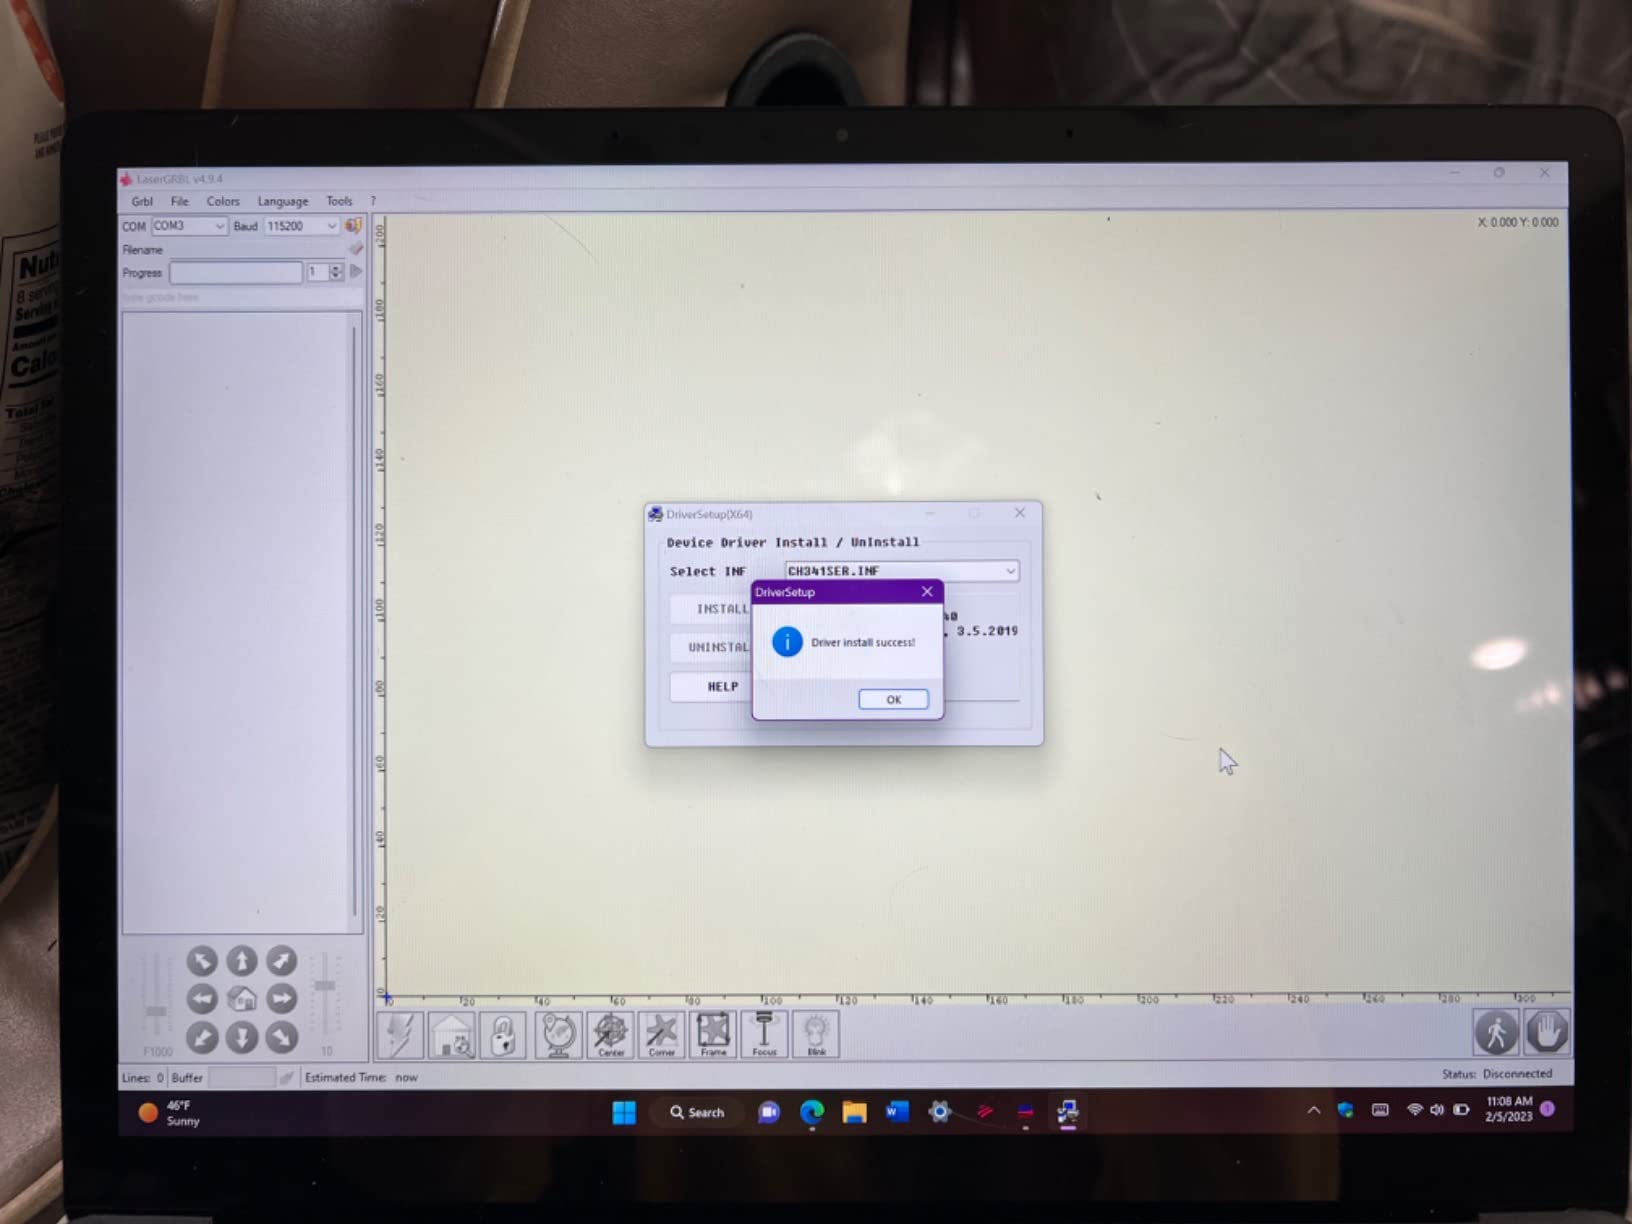
Software is broad: LaserGRBL, LightBurn, Benbox, GrblController and LiteFire, on Windows and macOS, with macOS through LightBurn only, and PWM mode engraving is supported. At 4.1 stars across 137 reviews with 66% five-star ratings, owners highlight fast assembly, easy focusing and solid results on wood, acrylic and leather.
Why the bed size is the reason to buy it
Once you are past tags and small blanks, bed size becomes the constraint. At 410 x 420mm you can lay out a full batch of coasters, a set of house numbers or a wide shelf piece without splitting the file, and the 10mm wood cutting figure means many of those pieces come out in a single pass.
The tool-free focusing is a bigger deal for beginners than the spec sheet suggests. Most first-project failures on entry-level machines are focus errors, and a head you slide and tighten by hand takes seconds to correct rather than requiring a tool and a caliper.
Where you will hit a wall
The honeycomb working bed is sold separately, and the included A4-size steel pad is what you get out of the box. That means your usable area is much smaller than the 410 x 420mm figure until you buy the honeycomb bed, and it is the most common disappointment owners report. Add it to your real budget.
Second, LaserGRBL is free but function-limited, and LightBurn is a paid upgrade, so budget for that if you want full control. Third, stainless steel needs a marker-blackened, non-reflective surface before it will engrave clearly, which is a preparation step beginners rarely expect.
10. LONGER Ray5 5W – Best for Touchscreen Setup
LONGER Laser Engraver Ray5 5W Higher Accuracy DIY Laser Engraving Machine with 3.5″ Touch Screen,Offline Usage Laser Cutter,400x400mm,0.08mm Laser Spot, CNC Laser Cutter for Wood Metal Acrylic Glass
5W Class II module
400 x 400mm work area
0.08mm spot and 0.01mm accuracy
Offline operation
Pros
- 0.08mm spot with 0.01mm engraving accuracy for clean detail
- 400 x 400mm bed is generous for the power class
- 3.5-inch touchscreen plus Wi-Fi
- app and TF card with offline operation
- ESP32 platform is fast and widely compatible
- Emergency shutdown
- motion protection and overheat detection
Cons
- Top speed of 10000mm/min is slower than newer 10W Ray5 models
- 5W struggles with thick wood and metal compared with higher-wattage machines
- Setting up the touchscreen and software parameters takes learning
The Ray5 5W is the gentlest way into a large-bed machine. It combines a 400 x 400mm work area, the same as the much faster 10W version in this list, with 5W of optical power that will mark anything you will realistically want to mark on a first machine. The laser point is 0.08 x 0.08mm with 0.01mm engraving accuracy, which is precise for the money.
What makes it stand out from the other 5W options is the 3.5-inch touchscreen and the offline workflow. You can load a job from USB, a TF card or the app, watch progress on the screen, and adjust parameters without the machine being near your computer. For someone who does not want to learn a command line before their first project, that removes a real barrier.
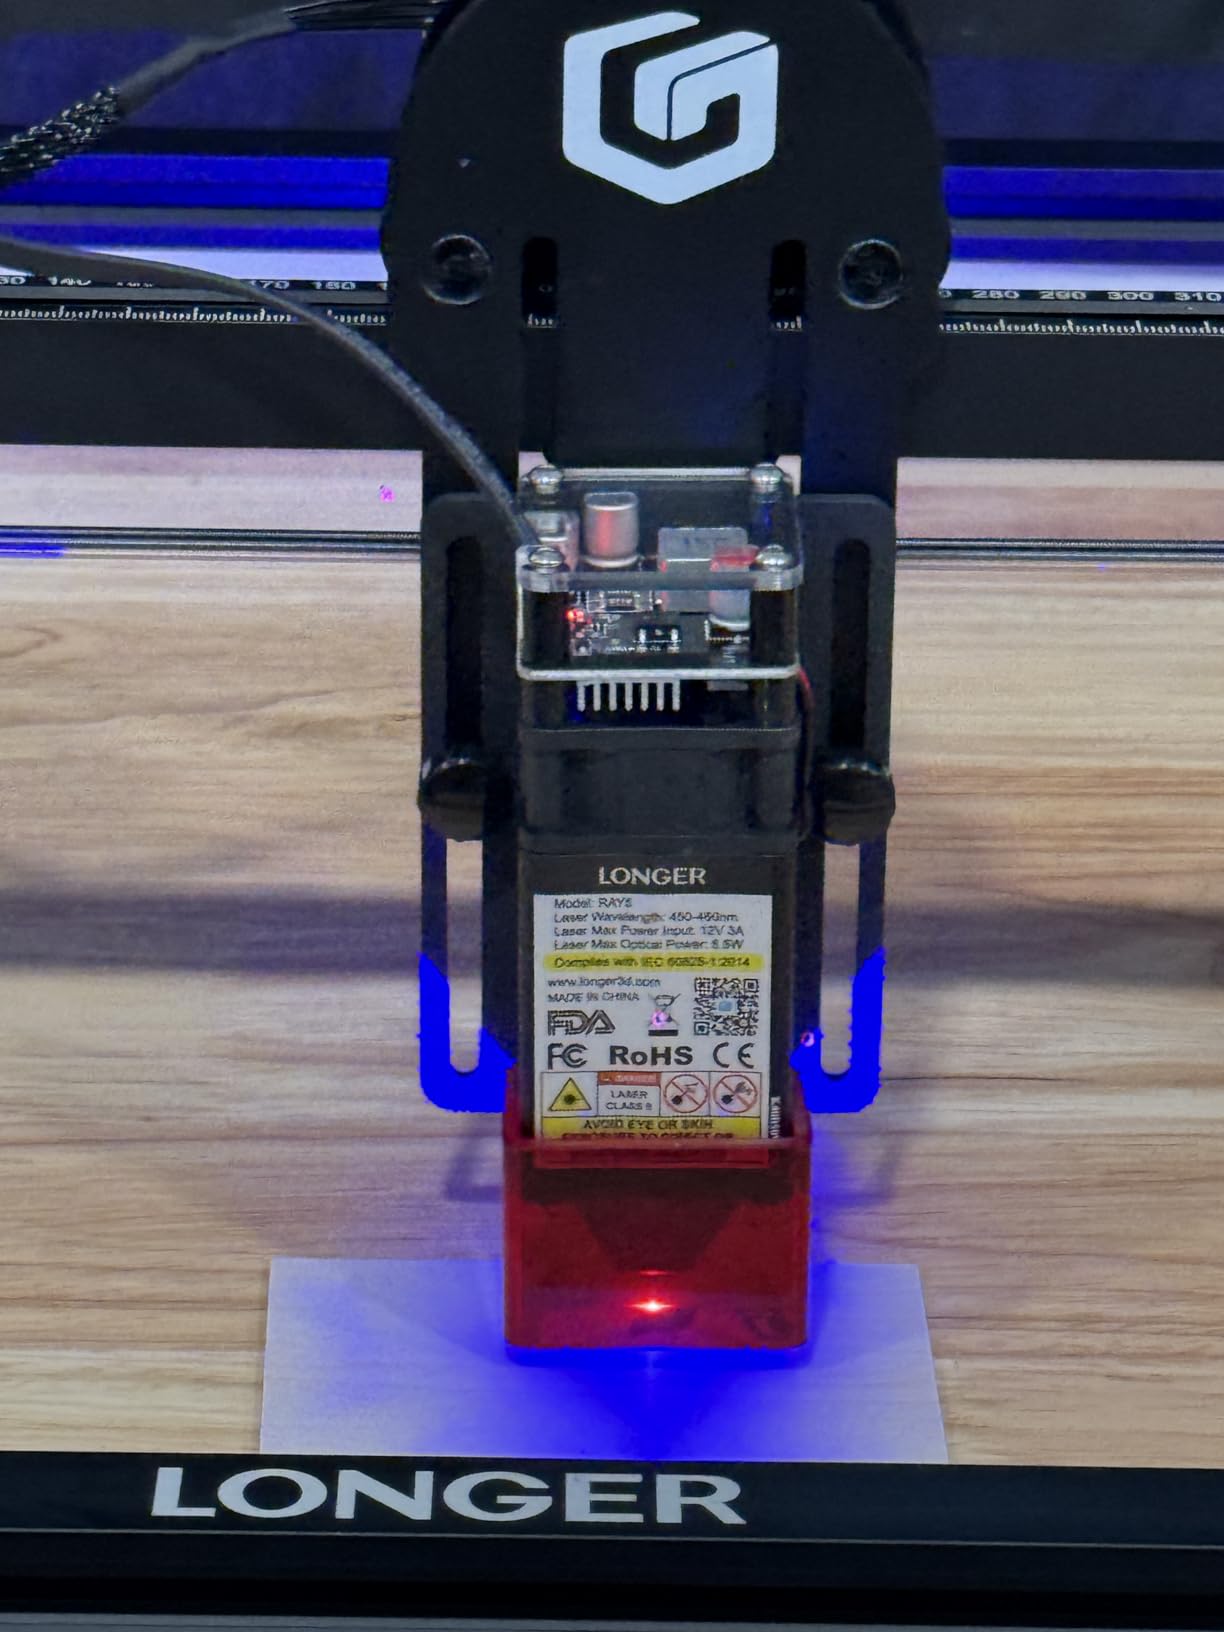
Underneath it is a 240MHz ESP32 chipset running up to 10,000mm/min, which is the same controller family as the 10W Ray5 and shares its wide software compatibility. Safety hardware is standard for the class and better than most: emergency shutdown, motion protection, overheat detection, protective covers and goggles. At 8.26 pounds and 23.6 x 12.2 x 5.9 inches it is a table machine rather than a floor machine.
At 4.1 stars across 129 reviews with 68% five-star ratings, owners consistently praise the precision, the large bed and the touchscreen. The complaints are all about power and speed rather than quality: 5W struggles with thick wood and metal compared with the higher-wattage machines, and the 10,000mm/min ceiling is well below the 24,000mm/min of the 10W Ray5.
Why this is the calmest first machine
A large bed means you are not constantly re-positioning small scraps, so each job takes fewer homing cycles and produces fewer alignment errors. The touchscreen means fewer trips between the machine and the laptop, and offline operation means a dropped Wi-Fi connection does not kill a job halfway through.
It is also a sensible second machine for anyone who starts on the small ACMER S1 and outgrows the 130 x 130mm bed, because it keeps the same LONGER software environment and control board family you already learned.
Where you will be disappointed
The honest limit is power. At 5W you are marking surfaces and cutting very thin material; you will not cut thick plywood or metals, and if you buy it expecting the same output as the 10W Ray5 you will be disappointed. If your project list already includes cutting shapes out of sheet material, buy more power and save yourself the upgrade.
Speed is the second limit at 10,000mm/min, roughly 40% of the 10W model’s ceiling, so batch jobs take meaningfully longer. Finally, setting up the touchscreen and software parameters takes some learning, and buyers who expected the screen to be a complete replacement for control software find that it is a monitor and a tuner, not a full design environment.
Which Laser Type Should You Start With?
Start with a diode laser in the 5W to 10W range. Every machine in this roundup is a diode machine, and that is not an accident: it is the consensus on r/Laserengraving, it is what most first-time buyers end up with, and it is the least demanding to set up, learn and house.
There are four laser types you will meet in listings, and they are not interchangeable.
Diode (450nm blue): what all ten machines here use. Cheapest to run, excellent on wood, bamboo, leather, paper and acrylic, and it can cut thin material. It cannot engrave bare metal, and the beam is visible blue so you can see where it is pointing.
CO2 (10.6 micrometre infrared): a glass tube that cuts wood, acrylic and leather beautifully and engraves glass superbly, but it needs a water chiller, a compressor, a bed of honeycomb and usually a ventilated cabinet. It is effectively a two-machine purchase for a beginner and is where most first-time buyers get discouraged.
Galvo (infrared or blue scanning): a mirror on a motor scans the whole bed without moving the head, which makes it extremely fast and flat. It is the right choice for volume production on flat items, and the wrong choice for thick cutting or a first machine, because there is almost no depth control.
Infrared 1064nm lasers: these mark metals, which no diode can do properly, but the beam is invisible. That is the single most misunderstood hazard in the whole category: users assume an infrared machine is safer because they cannot see it, when it is the opposite. You need OD5-plus 1064nm glasses, and you should never watch an infrared beam, visible or not.
The practical takeaway is that the choice of type is mostly a decision about what you want to make. Wood, acrylic, leather, paper, cardboard, bamboo and jewelry blanks all work on a diode. If your project list is stainless steel, aluminum or glass only, a diode will frustrate you and you need infrared or CO2 instead.
How to Read Laser Specs Without Falling for the Marketing
Look at optical output, not the biggest number on the page. Machine input power and optical output are different numbers, and the gap is where most beginner disappointment comes from.
In this roundup you can see the pattern clearly. The ACMER S1 is described with 2500mW laser and 24W machine output. The Creality Falcon 10W lists 72,000mW machine power with 10W laser output, and the enclosed Falcon A1 lists 80,000mW machine power with 10W output. Those are not lies, and they are not directly comparable either; the machine figure includes the power supply, cooling and motion systems. The only number that describes your beam is the optical output, so that is the number to compare across machines.
Three other specs deserve a close look.
Work area versus engraving area is the same dimension measured differently, and the honest version is the smaller one. A machine quoting 410 x 420mm engraving area with a smaller physical bed, or one that only accepts a fixed honeycomb panel size, will refuse material that technically fits the number. This is why the Creality Falcon A1 is limited to 460 x 346mm panels and why the ACMER S1 feels smaller than its footprint suggests.
Spot size determines the finest detail you can resolve, and it is more relevant to a beginner than speed. Anything at or under 0.08mm produces clean small text; a wider spot will blur serial numbers and fine logos no matter how much power you add. Several machines here hit 0.06mm, and that is a real quality difference rather than a marketing number.
Air assist is the least glamorous and most useful feature on the list. A pump blowing air across the beam clears smoke and debris so the laser sees clean material, and it is what separates a crisp cut from a scorched one. Machines with a built-in air-assist interface on the module, like the ORTUR and the Twotrees, save you from a retrofit; machines where the pump is a separate variant, like the base Creality Falcon 10W, do not.
On software, every machine here runs LaserGRBL, and most also bundle something free alongside it: Acmerstudio on the ACMER, Benbox on the Sculpfun, the brand apps on the two ATOMSTACK machines, and Falcon Design Space on the enclosed Creality. LaserGRBL is simpler and free but limited, while LightBurn costs a one-off fee and is what most serious users move to once they are making real projects. If you are on a Mac, note that LightBurn is the reliable route on several of these machines, since LaserGRBL is Windows-only.
Safety Before Your First Burn
You need three things that are not in the box with any open-frame machine in this roundup: wavelength-matched safety glasses, an enclosure or lid, and filtered fume extraction. Budget for all three before the machine arrives, not after your first job.
On eye protection, the rule is simple and non-negotiable: glasses must match the wavelength. These machines emit around 450nm blue light, and ordinary safety glasses will not protect you from it. Where a machine includes glasses, as the ORTUR, both ATOMSTACK machines and both LONGER Ray5 models do, that is one of the reasons to prefer them. On the enclosed Creality Falcon A1, the Class 1 body blocks 99% of the laser light and no goggles are required during normal use, which is the entire reason it exists.
On ventilation, the honest rule is that an open frame in a closed room is a bad combination. Wood, leather and plastics produce particulate and gas, and acrylic in particular produces a distinctly unpleasant odour. A filtered extractor with a hose out of the window solves most of it. Community consensus on the maker and LightBurn forums is blunt about this: opening a window is not extraction, and it does not carry smoke away from your face.
On fire, the material that actually causes problems is anything thin and dark. Paper, thin card, fabric and laser-cut paper can ignite, which is why you should keep a fire extinguisher within reach and never leave a cut job unattended, and why the tilt alarms and limit switches on the higher-spec open frames are worth having.
And on materials you should never engrave, the list is short but absolute: PVC and vinyl release chlorine gas and hydrogen chloride, which is genuinely dangerous and corrosive; polycarbonate burns badly and discolours; unknown plastics should never be guessed at because you cannot test a fume safely. If you do not know exactly what a material is, laser a small offcut in a ventilated space first, or do not laser it at all. This is a genuine safety risk in the hobby and it is entirely avoidable.
For anyone whose interest in lasers is therapeutic rather than fabrication, our guide to cold laser devices used in pain management covers a completely different category with entirely different safety rules.
Your First Project: Settings and Fixes
Burn a scrap square before you burn anything you care about. Take an offcut of the same wood or acrylic, divide it into a grid, and run a test pattern at several power and speed settings. You are looking for the lowest power that produces a consistent mark at a speed that is comfortably below your machine’s maximum.
Start slower than the specification sheet suggests. These machines are advertised at speeds up to 24,000mm/min or 400mm/s, and those are numbers for perfect settings, aligned optics and clean material. Begin at a fraction of that and increase until the burn starts to weaken, then back off. A slow, slightly dark mark is easy to improve; a scorched or cut-through mark is permanent.
Focus first, every time. This is the number one cause of a bad first result, and it is also the number one fix. The ACMER S1 and the Creality Falcon 10W include focusing aids, and the Sculpfun S6 Pro uses a sliding focus lens that you set by hand, but the general method is the same: use the gauge or the ruler method to set the distance from the top of the material to the lens, and check it again whenever you change material thickness.
Four failures account for most ruined first attempts.
Inconsistent burn across one pass means air assist is missing or set too low, the focus is off, or the bed is not level. Check air assist first, since it is the most common cause.
Burned straight through thin material means too much power or too little speed. Halve the power and try again before adding passes.
Nothing visible happens on a diode machine usually means the material is wrong. Acrylic, PVC and mirror-finished metals all behave differently from what a beginner expects, and bare metal will not mark at all without a coating or marking spray.
Files will not open or the machine alarms mid-job is usually a software or firmware issue rather than a hardware fault. Save your work, power the machine fully off, and re-home before changing anything else.
What to engrave first matters less than you would think. Keychains, pet tags, coasters, leather bookmarks and small wood blanks are the projects beginners most often report, and they are good ones because a failure costs almost nothing. Do not start with an expensive board or a commissioned piece.
Frequently Asked Questions
Which laser engraver is the easiest for beginners to use?
The Creality Falcon A1 is the easiest because it arrives fully assembled, is fully enclosed and Class 1 certified so no goggles are needed, and uses an HD camera to position material automatically. If you want the lowest-effort option on a smaller budget, the ACMER S1 is 99% preassembled at under 2kg and comes with free software.
What do I need to know before buying a laser engraver?
Know four things first: the real optical output in watts rather than the machine input figure, the work area measured against the largest item you want to make, whether the frame is enclosed, and what safety gear is included. Then confirm the software works on your operating system, because most entry-level control software is Windows-only and LightBurn is the route to Mac and Linux.
What should you not laser engrave?
Never engrave PVC or vinyl, which release chlorine gas, and avoid polycarbonate, which burns badly. Do not guess at unknown plastics, and treat mirror-finished metals and mirrored acrylic as prohibited because the reflected beam is dangerous. If you cannot identify a material with certainty, do not laser it.
Which is easier to use, LightBurn or LaserGRBL?
LaserGRBL is easier to start and free, but it only moves and fires the laser, so it is not a design tool. LightBurn costs a one-off fee but imports files, sets parameters, does multi-pass cutting and camera alignment, and works on Windows, Mac and Linux. Most beginners start in LaserGRBL and move to LightBurn once they are making real projects.
What do you spray on glass before laser engraving?
You use a laser marking spray, typically a white titanium dioxide paint, which is painted onto the glass, allowed to dry, and engraved as a coating. The paint darkens under the beam so the mark shows against the transparent glass. A plain diode cannot mark bare glass at all, so this is the usual workaround for engraving it.
What is the average lifespan of a laser engraving machine?
It depends far more on use than on brand. The one published figure in this roundup is the ATOMSTACK A20 Pro V2, rated for up to 10000 hours of module life, and a hobby user engraving a few hours a week will reach that over years. Heat, dust and running long jobs hot are what shorten it, so cleaning the lens and cooling path matters more than the purchase decision.
How to Choose in 30 Seconds
If you want one answer, take the ORTUR Laser Master 2 S2 LU2-10A. Ten watts of real optical power on a full metal frame, a 390 x 410mm bed, both LaserGRBL and LightBurn, and 1474 reviews of long-term owner data behind it. It is the best laser engraver for beginners who want a machine that will not be replaced in a year.
Choose instead the Twotrees TTS-55 Pro if you want the highest rating and included air assist, the ACMER S1 if your budget is tight and your projects are small, the Creality Falcon A1 if you need it to be safe in a shared home, and the ATOMSTACK A20 Pro V2 if you are already thinking about selling. Whichever you pick, buy wavelength-matched glasses, an enclosure and filtered extraction in the same month as the machine.
You can find our other buying guides on the site, including the best colour laser printers if you are setting up a small workspace, and we will keep this roundup updated as 2026 brings new models through.